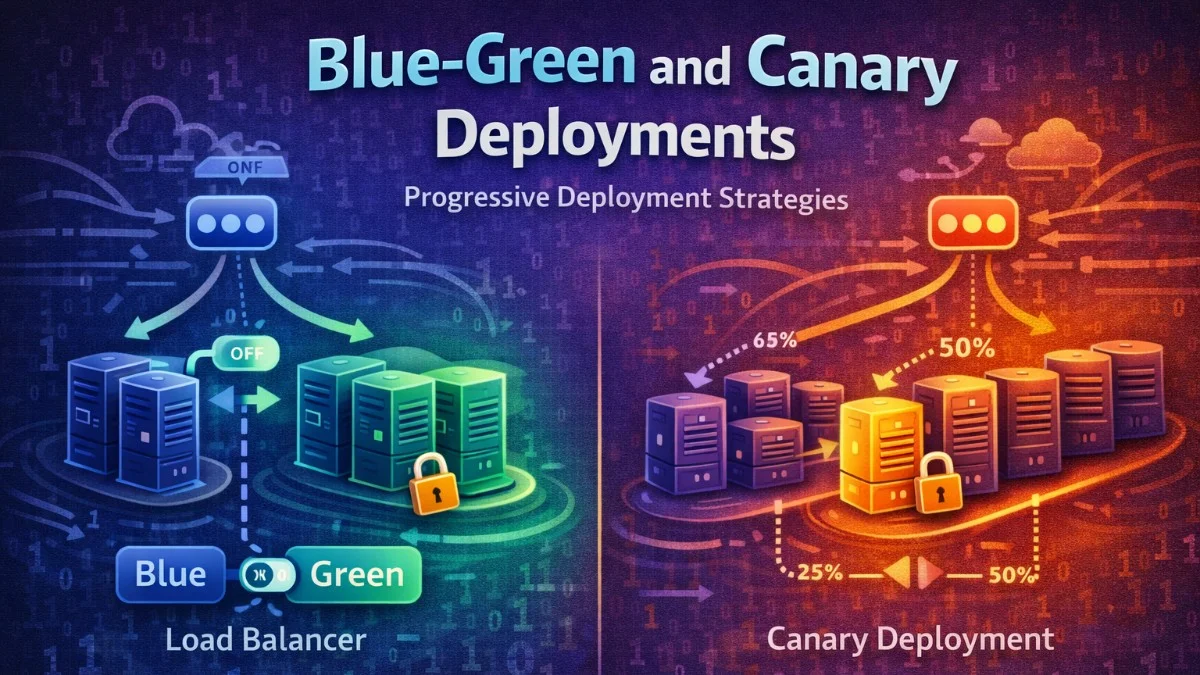
Deploying software safely requires strategies that minimize risk and enable quick rollback. Blue-green and canary deployments are progressive delivery techniques that reduce the blast radius of failures.
The Problem with Big-Bang Deployments
Traditional deployments push changes to all servers simultaneously, hoping nothing breaks. If something does go wrong, every user is affected while the team scrambles to rollback. This approach creates unnecessary risk that modern deployment strategies can eliminate.
The following diagram illustrates the fundamental problem with traditional deployments. When you deploy to all servers at once, you are betting that nothing will go wrong. If your bet is wrong, every single user experiences the failure.
Traditional deployment:
1. Deploy to all servers simultaneously
2. Hope nothing breaks
3. If it breaks, scramble to rollback

Risk: 100% of users affected immediately
Blue-Green Deployments
Concept
Blue-green deployments maintain two identical production environments. At any time, only one environment serves live traffic while the other sits idle, ready for the next deployment. When you deploy, you deploy to the idle environment and then switch traffic over.
This diagram shows how traffic routing changes during a blue-green deployment. You will notice that the switch is instantaneous since you are simply redirecting the load balancer to point at a different upstream.
Before deployment:
┌─────────────────┐
│ Load Balancer   │
└────────┬────────┘
         ↓
┌─────────────────┐     ┌─────────────────┐
│  Blue (Active)  │     │  Green (Idle)   │
│  Version 1.0    │     │  (empty)        │
└─────────────────┘     └─────────────────┘

After deployment:
┌─────────────────┐
│ Load Balancer   │
└────────┬────────┘
         ↓
┌─────────────────┐     ┌─────────────────┐
│  Blue (Idle)    │     │  Green (Active) │
│  Version 1.0    │     │  Version 1.1    │
└─────────────────┘     └─────────────────┘
The beauty of this approach is that rollback is instantaneous. If something goes wrong with the green environment, you simply switch traffic back to blue.
Implementation with Nginx
You can implement blue-green deployments with Nginx by defining separate upstream blocks for each environment. The active upstream receives all traffic, and switching environments is just a matter of updating which servers are in the active group.
The following configuration demonstrates how to set up upstream server groups for both environments. When you need to switch traffic, you will modify which servers appear in the active upstream block.
# /etc/nginx/conf.d/app.conf

upstream blue {
    server blue-1:8080;
    server blue-2:8080;
}

upstream green {
    server green-1:8080;
    server green-2:8080;
}

# Active environment (change this to switch)
upstream active {
    server green-1:8080;
    server green-2:8080;
}

server {
    listen 80;

    location / {
        proxy_pass http://active;
    }
}
Note that the active upstream definition determines which environment receives traffic. You will update this when switching environments.
Switching Script
To automate the environment switch, you can use a bash script that reads the current environment, updates the Nginx configuration, and reloads the server. This script ensures the configuration is valid before applying changes.
This script handles the complete switching process. It determines which environment is currently active, updates the configuration to point to the other environment, and safely reloads Nginx only after validating the new configuration.
#!/bin/bash
# switch-environment.sh

CURRENT=$(cat /etc/nginx/current-env)

if [ "$CURRENT" == "blue" ]; then
    NEW="green"
else
    NEW="blue"
fi

# Update nginx config
sed -i "s/upstream active {/upstream active { # $NEW/" /etc/nginx/conf.d/app.conf
sed -i "s/server $CURRENT/server $NEW/g" /etc/nginx/conf.d/app.conf

# Reload nginx
nginx -t && nginx -s reload

# Record new active environment
echo "$NEW" > /etc/nginx/current-env

echo "Switched from $CURRENT to $NEW"
The nginx -t command tests the configuration before reloading, preventing you from accidentally breaking your production setup with a syntax error.
AWS Implementation
When using AWS, you can leverage Application Load Balancer target groups with weighted routing to implement blue-green deployments. This approach gives you fine-grained control over traffic distribution and integrates well with other AWS services.
The CloudFormation template below creates two target groups and a listener rule with weighted routing. You can adjust the weights to control how traffic flows between your blue and green environments.
# CloudFormation with weighted routing
Resources:
  BlueTargetGroup:
    Type: AWS::ElasticLoadBalancingV2::TargetGroup
    Properties:
      Name: blue-targets

  GreenTargetGroup:
    Type: AWS::ElasticLoadBalancingV2::TargetGroup
    Properties:
      Name: green-targets

  ListenerRule:
    Type: AWS::ElasticLoadBalancingV2::ListenerRule
    Properties:
      Actions:
        - Type: forward
          ForwardConfig:
            TargetGroups:
              - TargetGroupArn: !Ref BlueTargetGroup
                Weight: 0  # Inactive
              - TargetGroupArn: !Ref GreenTargetGroup
                Weight: 100  # Active
By adjusting the weights, you can instantly switch all traffic from one target group to another. Setting one weight to 0 and the other to 100 achieves the classic blue-green switch.
Canary Deployments
Concept
Canary deployments take a more gradual approach than blue-green. Instead of switching all traffic at once, you route a small percentage to the new version first. If metrics look good, you gradually increase the percentage until the new version handles all traffic.
The following diagram shows the progressive traffic shifting that defines canary deployments. You start with a tiny percentage exposed to the new version and increase it only after validating stability at each stage.
Initial state:
100% → Production (v1.0)

Canary phase:
5% → Canary (v1.1)
95% → Production (v1.0)

Gradual rollout:
25% → New version (v1.1)
75% → Production (v1.0)

Complete:
100% → New version (v1.1)
This approach lets you validate changes with real production traffic before committing fully. If the canary shows problems, only a small percentage of users are affected.
Kubernetes Canary
In Kubernetes, you can implement canary deployments by running two deployments with different replica counts. A Service that selects both deployments distributes traffic proportionally based on the number of pods.
The following configuration creates two separate deployments with different version labels. The Service uses a broad selector that matches pods from both deployments, automatically distributing traffic based on the ratio of replicas.
# Production deployment
apiVersion: apps/v1
kind: Deployment
metadata:
  name: myapp-stable
spec:
  replicas: 9
  selector:
    matchLabels:
      app: myapp
      version: stable
  template:
    metadata:
      labels:
        app: myapp
        version: stable
    spec:
      containers:
        - name: myapp
          image: myapp:1.0.0

---
# Canary deployment
apiVersion: apps/v1
kind: Deployment
metadata:
  name: myapp-canary
spec:
  replicas: 1  # 10% of total (1 of 10 pods)
  selector:
    matchLabels:
      app: myapp
      version: canary
  template:
    metadata:
      labels:
        app: myapp
        version: canary
    spec:
      containers:
        - name: myapp
          image: myapp:1.1.0

---
# Service routes to both
apiVersion: v1
kind: Service
metadata:
  name: myapp
spec:
  selector:
    app: myapp  # Matches both stable and canary
  ports:
    - port: 80
With 9 stable pods and 1 canary pod, roughly 10% of traffic goes to the canary. You can adjust the replica counts to change the traffic split. Note that this method provides approximate percentages since Kubernetes round-robins across all matching pods.
Istio Traffic Splitting
For more precise traffic control, Istio's VirtualService lets you define exact percentages. This is particularly useful when you need fine-grained control or want to route based on headers or other request attributes.
The configuration below uses Istio's traffic management capabilities to define exact weights for each version. The DestinationRule identifies which pods belong to each subset, while the VirtualService controls the traffic distribution.
apiVersion: networking.istio.io/v1beta1
kind: VirtualService
metadata:
  name: myapp
spec:
  hosts:
    - myapp
  http:
    - route:
        - destination:
            host: myapp
            subset: stable
          weight: 95
        - destination:
            host: myapp
            subset: canary
          weight: 5

---
apiVersion: networking.istio.io/v1beta1
kind: DestinationRule
metadata:
  name: myapp
spec:
  host: myapp
  subsets:
    - name: stable
      labels:
        version: stable
    - name: canary
      labels:
        version: canary
The DestinationRule defines which pods belong to each subset based on labels, while the VirtualService controls how traffic is distributed between them.
Progressive Rollout with Argo Rollouts
Argo Rollouts automates the canary process with a declarative configuration. You define the rollout steps, and Argo handles the traffic shifting and pausing automatically. This is ideal for teams that want a hands-off approach to progressive delivery.
This Rollout resource defines a complete progressive delivery strategy. Each step either adjusts the canary weight or pauses for observation, giving you time to monitor metrics between each traffic increase.
apiVersion: argoproj.io/v1alpha1
kind: Rollout
metadata:
  name: myapp
spec:
  replicas: 10
  strategy:
    canary:
      steps:
        - setWeight: 5
        - pause: {duration: 10m}
        - setWeight: 25
        - pause: {duration: 10m}
        - setWeight: 50
        - pause: {duration: 10m}
        - setWeight: 75
        - pause: {duration: 10m}
      canaryMetadata:
        labels:
          version: canary
      stableMetadata:
        labels:
          version: stable
  selector:
    matchLabels:
      app: myapp
  template:
    metadata:
      labels:
        app: myapp
    spec:
      containers:
        - name: myapp
          image: myapp:1.1.0
Each step either sets the canary weight or pauses for a duration. This gives you time to monitor metrics between each traffic increase. If something goes wrong, Argo can automatically rollback based on analysis results.
Automated Rollback
Metric-Based Rollback
The real power of progressive delivery comes from automated rollback based on metrics. Argo Rollouts can query Prometheus to check success rates and automatically abort the rollout if thresholds are not met.
This configuration combines rollout steps with automated analysis. Between weight changes, Argo runs the specified analysis template that queries your metrics system and evaluates whether the canary is healthy enough to proceed.
# Argo Rollouts with analysis
apiVersion: argoproj.io/v1alpha1
kind: Rollout
metadata:
  name: myapp
spec:
  strategy:
    canary:
      steps:
        - setWeight: 10
        - pause: {duration: 5m}
        - analysis:
            templates:
              - templateName: success-rate
            args:
              - name: service
                value: myapp-canary
        - setWeight: 50
        - pause: {duration: 10m}
        - analysis:
            templates:
              - templateName: success-rate

---
apiVersion: argoproj.io/v1alpha1
kind: AnalysisTemplate
metadata:
  name: success-rate
spec:
  args:
    - name: service
  metrics:
    - name: success-rate
      interval: 1m
      successCondition: result[0] >= 0.99
      failureLimit: 3
      provider:
        prometheus:
          address: http://prometheus:9090
          query: |
            sum(rate(http_requests_total{service="{{args.service}}",status=~"2.."}[5m])) /
            sum(rate(http_requests_total{service="{{args.service}}"}[5m]))
The analysis runs between weight changes, checking that at least 99% of requests succeed. If the success rate drops below the threshold three times, Argo automatically rolls back to the stable version.
Laravel Health Check
A robust health check endpoint is essential for any deployment strategy. It should verify that critical dependencies are working, not just that the application is running. This endpoint serves as the foundation for load balancer health checks and automated rollback decisions.
The following controller implements a comprehensive health check that verifies database, cache, and queue connectivity. This gives load balancers and deployment tools the information they need to make routing decisions.
// app/Http/Controllers/HealthController.php
class HealthController extends Controller
{
    public function check()
    {
        $checks = [
            'database' => $this->checkDatabase(),
            'cache' => $this->checkCache(),
            'queue' => $this->checkQueue(),
        ];

        $healthy = !in_array(false, $checks, true);

        return response()->json([
            'status' => $healthy ? 'healthy' : 'unhealthy',
            'checks' => $checks,
            'version' => config('app.version'),
        ], $healthy ? 200 : 503);
    }

    private function checkDatabase(): bool
    {
        try {
            DB::select('SELECT 1');
            return true;
        } catch (Exception $e) {
            return false;
        }
    }
}
Returning a 503 status code when unhealthy tells load balancers to stop sending traffic to this instance. Including the version in the response helps you verify which version is running during deployments.
Database Migrations
Backward Compatible Changes
Database changes require special care during progressive deployments because both old and new application versions may run simultaneously. Always make changes in phases to maintain backward compatibility.
The following migration strategy demonstrates the three-phase approach you should use for any schema change. Each phase can be deployed independently, ensuring the previous version of your application continues to work.
// Phase 1: Add new column (nullable)
Schema::table('users', function (Blueprint $table) {
    $table->string('display_name')->nullable();
});

// Phase 2: Backfill data
User::whereNull('display_name')->chunk(100, function ($users) {
    foreach ($users as $user) {
        $user->update(['display_name' => $user->name]);
    }
});

// Phase 3: Make required (after full rollout)
Schema::table('users', function (Blueprint $table) {
    $table->string('display_name')->nullable(false)->change();
});
The key insight is that Phase 3 only runs after all instances are on the new version. If you make the column required before the old version is gone, the old version will fail when inserting records.
Feature Flags for Database Changes
When your application code depends on a new database column, use feature flags to safely transition. This lets you control when the application starts using the new column, independent of when the migration runs.
This service method shows how to use feature flags to gradually adopt a new database column. You can enable the feature flag for a subset of users or traffic to validate the change before full rollout.
class UserService
{
    public function getDisplayName(User $user): string
    {
        if (Feature::active('use-display-name')) {
            return $user->display_name ?? $user->name;
        }

        return $user->name;
    }
}
The null coalescing operator provides a fallback during the transition period when some records might not have the display_name populated yet.
Deployment Checklist
Pre-Deployment
Having a checklist ensures you do not skip important steps in the heat of a deployment. Print this out or integrate it into your deployment tooling.
- [ ] All tests passing
- [ ] Database migrations are backward compatible
- [ ] Feature flags in place for risky changes
- [ ] Monitoring dashboards ready
- [ ] Rollback procedure documented
- [ ] On-call engineer notified
During Deployment
Active monitoring during deployment catches problems early when they are easiest to address.
- [ ] Deploy to canary/green environment
- [ ] Verify health checks passing
- [ ] Check error rates
- [ ] Monitor latency
- [ ] Verify key user journeys
- [ ] Gradual traffic shift
Post-Deployment
Do not consider the deployment complete until you have monitored the system under full load and cleaned up artifacts from the deployment process.
- [ ] Full traffic on new version
- [ ] Monitor for 30 minutes
- [ ] Clean up old version
- [ ] Update documentation
- [ ] Notify stakeholders
Comparison
| Aspect | Blue-Green | Canary |
|---|---|---|
| Complexity | Lower | Higher |
| Resource cost | 2x infrastructure | Minimal overhead |
| Rollback speed | Instant | Fast |
| Risk exposure | All or nothing | Gradual |
| Testing in production | Limited | Extensive |
| Best for | Simple apps | Complex systems |
Best Practices
- Automate everything - Manual steps introduce errors
- Monitor aggressively - Watch error rates during rollout
- Define rollback criteria - Know when to abort
- Keep deployments small - Easier to debug issues
- Use feature flags - Decouple deploy from release
- Practice rollbacks - Ensure they actually work
- Maintain backward compatibility - Old and new must coexist
Conclusion
Blue-green deployments provide simple, instant switching between versions. Canary deployments offer gradual rollout with real production traffic validation. Choose blue-green for simpler applications and instant rollback needs. Choose canary for complex systems where progressive validation is worth the added complexity. Both dramatically reduce deployment risk compared to big-bang releases.