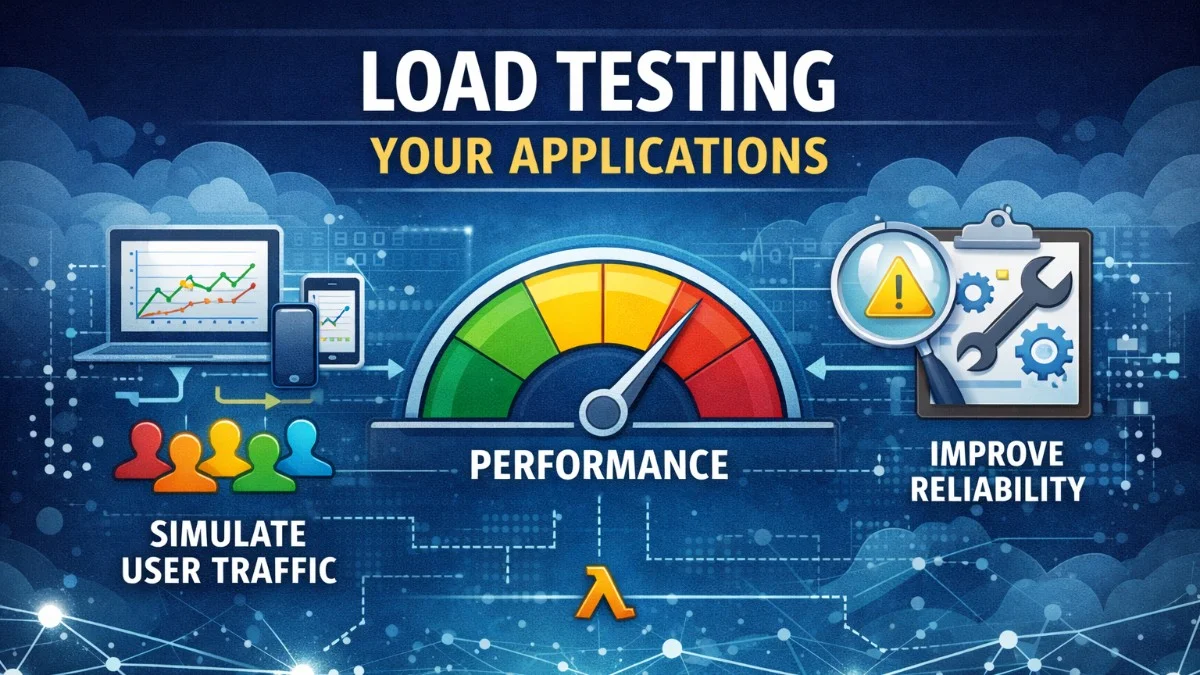
Load testing reveals how your application behaves under stress before real users discover its limits. This guide covers load testing strategies, tools, and interpreting results to build applications that scale reliably.
Why Load Test?
Discover Before Users Do
Production failures are expensive:
- Lost revenue during downtime
- Damaged reputation
- Emergency debugging under pressure
Load testing reveals:
- Maximum concurrent users
- Response time degradation patterns
- Resource bottlenecks
- Breaking points
Types of Performance Tests
| Test Type | Purpose | Duration |
|---|---|---|
| Load Test | Normal expected load | Minutes to hours |
| Stress Test | Beyond normal capacity | Until failure |
| Spike Test | Sudden traffic surge | Short bursts |
| Soak Test | Sustained load | Hours to days |
| Breakpoint Test | Find maximum capacity | Incremental increase |
Load Testing Tools
k6 (Recommended)
Modern, developer-friendly tool written in Go:
k6 uses JavaScript to define test scenarios, making it accessible to developers already familiar with the language. The following example demonstrates a basic load test with ramping traffic patterns that simulate real user behavior.
// load-test.js
import http from 'k6/http';
import { check, sleep } from 'k6';

export const options = {
    stages: [
        { duration: '2m', target: 100 },  // Ramp up
        { duration: '5m', target: 100 },  // Stay at 100 users
        { duration: '2m', target: 0 },    // Ramp down
    ],
    thresholds: {
        http_req_duration: ['p(95)<500'],  // 95% under 500ms
        http_req_failed: ['rate<0.01'],    // Error rate under 1%
    },
};

export default function () {
    const response = http.get('https://myapp.com/api/products');

    check(response, {
        'status is 200': (r) => r.status === 200,
        'response time < 500ms': (r) => r.timings.duration < 500,
    });

    sleep(1);
}
The stages configuration creates a realistic traffic pattern: gradual ramp-up, sustained load, and graceful ramp-down. The thresholds section defines pass/fail criteria that can fail your CI pipeline if performance degrades.
You can run k6 tests from the command line with various options to adjust virtual users and duration.
# Run test
k6 run load-test.js

# Run with more VUs
k6 run --vus 200 --duration 10m load-test.js
Apache JMeter
Industry-standard GUI tool:
JMeter has been the go-to load testing tool for years. While more verbose than k6, it offers a visual interface that non-developers often find more approachable. The configuration is XML-based, which you can generate from the GUI.
<!-- test-plan.jmx -->
<ThreadGroup>
    <stringProp name="ThreadGroup.num_threads">100</stringProp>
    <stringProp name="ThreadGroup.ramp_time">60</stringProp>
    <stringProp name="ThreadGroup.duration">300</stringProp>
</ThreadGroup>
Artillery
Node.js-based, YAML configuration:
Artillery strikes a balance between simplicity and power. Its YAML-based configuration is easy to read and version control, making it a good choice for teams that prefer declarative configuration.
# artillery.yml
config:
  target: "https://myapp.com"
  phases:
    - duration: 120
      arrivalRate: 10
      name: "Warm up"
    - duration: 300
      arrivalRate: 50
      name: "Sustained load"

scenarios:
  - name: "Browse products"
    flow:
      - get:
          url: "/api/products"
      - think: 2
      - get:
          url: "/api/products/{{ $randomNumber(1, 100) }}"
The think directive simulates real user behavior by adding pauses between requests. This prevents unrealistic request patterns that would never occur in production.
artillery run artillery.yml
Locust
Python-based with real-time web UI:
Locust lets you define user behavior in Python, offering full programming language flexibility. The web UI provides real-time monitoring during test execution, making it easy to observe how your application responds.
# locustfile.py
from locust import HttpUser, task, between

class WebsiteUser(HttpUser):
    wait_time = between(1, 3)

    @task(3)
    def view_products(self):
        self.client.get("/api/products")

    @task(1)
    def view_product_detail(self):
        product_id = random.randint(1, 100)
        self.client.get(f"/api/products/{product_id}")

    def on_start(self):
        # Login once per user
        self.client.post("/api/login", json={
            "email": "test@example.com",
            "password": "password"
        })
The @task decorator weights define probability - here, users browse products three times more often than viewing details. The on_start method runs once per simulated user for setup tasks like authentication.
locust -f locustfile.py --host=https://myapp.com
Realistic Test Scenarios
User Journey Simulation
Real users don't just hammer a single endpoint. They browse, pause to read, and follow logical paths through your application. This test simulates an e-commerce shopping flow with realistic timing between actions.
// k6: Realistic e-commerce flow
import http from 'k6/http';
import { check, group, sleep } from 'k6';

export default function () {
    group('Browse', function () {
        http.get('https://myapp.com/');
        sleep(2);
        http.get('https://myapp.com/api/products?category=electronics');
        sleep(3);
    });

    group('Product Detail', function () {
        const productId = Math.floor(Math.random() * 100) + 1;
        http.get(`https://myapp.com/api/products/${productId}`);
        sleep(5);
    });

    group('Add to Cart', function () {
        http.post('https://myapp.com/api/cart', JSON.stringify({
            product_id: 42,
            quantity: 1
        }), {
            headers: { 'Content-Type': 'application/json' }
        });
        sleep(2);
    });

    group('Checkout', function () {
        // Only 10% proceed to checkout
        if (Math.random() < 0.1) {
            http.post('https://myapp.com/api/checkout', JSON.stringify({
                payment_method: 'card'
            }), {
                headers: { 'Content-Type': 'application/json' }
            });
        }
    });
}
The group function organizes metrics by user action, making it easier to identify which part of the journey is slowest. The 10% checkout rate reflects real conversion funnels.
Data-Driven Testing
Testing with a variety of user accounts reveals issues that single-user tests miss, such as cache effectiveness and database query patterns across different data sets. Loading test data from files lets you simulate realistic user diversity.
// k6: Load test data from file
import { SharedArray } from 'k6/data';
import http from 'k6/http';

const users = new SharedArray('users', function () {
    return JSON.parse(open('./test-users.json'));
});

export default function () {
    const user = users[__VU % users.length];

    const loginRes = http.post('https://myapp.com/api/login', JSON.stringify({
        email: user.email,
        password: user.password
    }), {
        headers: { 'Content-Type': 'application/json' }
    });

    const token = loginRes.json('token');

    http.get('https://myapp.com/api/profile', {
        headers: { 'Authorization': `Bearer ${token}` }
    });
}
SharedArray loads test data once and shares it across all virtual users, minimizing memory usage. The modulo operation distributes users evenly across the available test accounts.
Key Metrics
Response Time Metrics
Understanding the difference between average and percentile metrics is crucial for meaningful performance analysis. Averages can hide problems that percentiles reveal.
Avg Response Time:     150ms    # Average (misleading)
Median (p50):          120ms    # Half of requests faster
p90:                   250ms    # 90% of requests faster
p95:                   400ms    # 95% of requests faster
p99:                   850ms    # 99% of requests faster
Max:                   2500ms   # Worst case
Focus on percentiles, not averages. The p95 and p99 show what slow users experience.
A few slow requests can hide behind a healthy average. If your p99 is 10x your p50, you have a tail latency problem that needs investigation.
Throughput Metrics
Throughput tells you how much work your system can handle. Watch for error rates that climb as load increases.
Requests/second:       500 rps
Successful requests:   49,500
Failed requests:       500
Error rate:            1%
Resource Metrics
Monitor during tests:
- CPU utilization
- Memory usage
- Disk I/O
- Network bandwidth
- Database connections
- Queue depth
Analyzing Results
Response Time Degradation
This pattern shows how response times typically degrade as load increases. The goal is to identify where your performance cliff occurs - the point where response times become unacceptable.
Load:    Response Time:
50 VU    100ms
100 VU   150ms
200 VU   300ms
300 VU   800ms    <- Performance cliff
400 VU   2500ms   <- Unacceptable
500 VU   Timeout  <- Breaking point
Identifying Bottlenecks
When tests reveal problems, these symptom-to-cause mappings help you start investigating in the right place. Most performance issues fall into predictable patterns.
Symptom:                    Likely Cause:
CPU at 100%                 Application code, no caching
Memory growing              Memory leaks, no limits
Database CPU high           Missing indexes, N+1 queries
Disk I/O high              Too much logging, no SSD
Connection pool exhausted   Pool too small, slow queries
Database Analysis
When you suspect the database is the bottleneck, these PostgreSQL queries help identify problematic queries and connection issues. Enable pg_stat_statements before your load test to capture query performance data.
-- Find slow queries during load test
SELECT query, calls, mean_time, total_time
FROM pg_stat_statements
ORDER BY total_time DESC
LIMIT 20;

-- Check connection count
SELECT count(*) FROM pg_stat_activity;

-- Lock contention
SELECT * FROM pg_locks WHERE NOT granted;
The lock query reveals blocking issues that cause request pile-ups. If you see many ungranted locks, you likely have contention problems.
Laravel-Specific Testing
Testing Authenticated Routes
Laravel's Sanctum authentication requires proper CSRF handling during load tests. This example shows the complete flow for authenticated API testing, including token extraction.
// k6: Laravel Sanctum authentication
import http from 'k6/http';

export function setup() {
    // Get CSRF token
    const csrfRes = http.get('https://myapp.com/sanctum/csrf-cookie');

    // Login
    const loginRes = http.post('https://myapp.com/login', JSON.stringify({
        email: 'test@example.com',
        password: 'password'
    }), {
        headers: {
            'Content-Type': 'application/json',
            'X-XSRF-TOKEN': csrfRes.cookies['XSRF-TOKEN'][0].value
        }
    });

    return {
        cookies: loginRes.cookies
    };
}

export default function (data) {
    http.get('https://myapp.com/api/user', {
        cookies: data.cookies
    });
}
The setup function runs once before all virtual users start, establishing authentication that's shared across the test. This prevents login endpoint overload.
Testing Queue Performance
Background job processing is often overlooked during load testing. Create jobs in bulk to verify your queue workers can keep up with production traffic. This artisan command helps you stress-test your queue infrastructure.
// Create many jobs for queue testing
Artisan::command('test:queue-load {count=1000}', function (int $count) {
    for ($i = 0; $i < $count; $i++) {
        ProcessOrder::dispatch(Order::find(rand(1, 100)));
    }
    $this->info("Dispatched {$count} jobs");
});
While jobs are processing, monitor queue depth and worker performance to identify if workers are keeping up.
# Monitor queue during test
php artisan queue:work --verbose &
watch -n 1 'php artisan queue:monitor redis:default'
CI/CD Integration
GitHub Actions
Automated load testing in CI catches performance regressions before they reach production. Run these tests nightly or before major releases to establish performance baselines.
# .github/workflows/load-test.yml
name: Load Test

on:
  schedule:
    - cron: '0 2 * * *'  # Nightly
  workflow_dispatch:

jobs:
  load-test:
    runs-on: ubuntu-latest
    steps:
      - uses: actions/checkout@v4

      - name: Install k6
        run: |
          curl -L https://github.com/grafana/k6/releases/download/v0.47.0/k6-v0.47.0-linux-amd64.tar.gz | tar xz
          sudo mv k6-v0.47.0-linux-amd64/k6 /usr/local/bin/

      - name: Run load test
        run: k6 run --out json=results.json tests/load/smoke.js

      - name: Check thresholds
        run: |
          if grep -q '"thresholds":{"http_req_duration":\["p(95)<500"\].*"ok":false' results.json; then
            echo "Performance thresholds not met!"
            exit 1
          fi

      - name: Upload results
        uses: actions/upload-artifact@v3
        with:
          name: load-test-results
          path: results.json
The threshold check step fails the build if performance degrades, creating accountability for performance as part of your development process.
Threshold Gates
Define strict thresholds that must pass for your build to succeed. These act as performance contracts that prevent gradual degradation over time.
// k6: Strict thresholds for CI
export const options = {
    thresholds: {
        http_req_duration: [
            'p(50)<200',   // Median under 200ms
            'p(95)<500',   // 95th percentile under 500ms
            'p(99)<1000',  // 99th percentile under 1s
        ],
        http_req_failed: ['rate<0.01'],  // Less than 1% errors
        http_reqs: ['rate>100'],          // At least 100 rps
    },
};
Start with generous thresholds and tighten them as you optimize. Unrealistic thresholds that always fail train teams to ignore them.
Performance Baselines
Establishing Baselines
Before optimizing, you need to know where you stand. Run baseline tests regularly to track performance over time and detect regressions early.
// Baseline test: Run weekly, compare results
export const options = {
    scenarios: {
        baseline: {
            executor: 'constant-vus',
            vus: 50,
            duration: '5m',
        },
    },
};
Tracking Over Time
Store results with timestamps to build a performance history. Simple scripts can compare results across runs to detect regressions automatically.
# Store results with timestamp
k6 run --out json=results/$(date +%Y%m%d).json load-test.js

# Compare with previous
python compare-results.py results/20240115.json results/20240122.json
Common Issues and Solutions
Connection Limits
When testing reveals connection issues, these nginx settings help handle higher concurrent connection counts. Adjust based on your expected peak load.
# nginx.conf - Increase worker connections
events {
    worker_connections 4096;
}

http {
    # Increase keepalive
    keepalive_timeout 65;
    keepalive_requests 1000;
}
Database Connection Pool
Laravel's database configuration supports connection pooling. Tune these values based on your load test findings to balance connection availability with database resource usage.
// config/database.php
'mysql' => [
    'pool' => [
        'min_connections' => 10,
        'max_connections' => 100,
    ],
],
Start with conservative values and increase based on observed connection usage. Too many connections can overwhelm your database server.
PHP-FPM Tuning
PHP-FPM settings directly impact how many concurrent requests your application can handle. These settings work well for a mid-sized application, but you should adjust based on your specific workload.
; php-fpm.conf
pm = dynamic
pm.max_children = 50
pm.start_servers = 10
pm.min_spare_servers = 5
pm.max_spare_servers = 20
pm.max_requests = 500
The pm.max_requests setting prevents memory leaks by recycling workers after a set number of requests.
Redis Connection Issues
Under load, Redis connections can become a bottleneck. Persistent connections reduce connection overhead significantly by reusing connections across requests.
// config/database.php
'redis' => [
    'client' => 'phpredis',
    'default' => [
        'persistent' => true,
        'persistent_id' => 'myapp',
        'read_timeout' => 60,
    ],
],
The phpredis client generally performs better than predis under high load. The persistent_id ensures connections are reused across requests.
Best Practices
- Test in production-like environment - Same hardware, data volume, network
- Use realistic data - Don't test with empty database
- Simulate real user behavior - Think times, varied paths
- Monitor everything - Application, database, network, queues
- Test regularly - Catch regressions early
- Start small - Smoke tests before full load tests
- Document findings - Track improvements over time
- Test failure modes - What happens when dependencies fail?
Conclusion
Load testing is essential for production confidence. Start with simple smoke tests, establish baselines, and gradually increase sophistication. Use k6 or similar modern tools for developer-friendly testing, integrate tests into CI/CD, and always test in production-like environments. The goal is discovering limits and bottlenecks before your users do.